Monday, March 28, 2011

Welcome Spring with Birds on a Branch

It's snowing outside right now, but spring should be right around the corner.  I found this idea on CraftyStylish, and I had to try it.  I have a bunch of birds and butterflies all around the house, so it fits right in.  It would make a great centerpiece for an Easter celebration.  It's sitting on my end table right now.  The nest is attached with a twisty tie, so I can take it off and have just the birds if I want to change it later.  The branch is sitting in a vase I made way back in High School.  I filled it up with beans that I had around, but you could also put this in a clear vase full of Easter candies and it would be really cute.


I had a hard time making the nest the way she did with yarn and glue, so I crocheted it instead.  I added a few Reeces candy eggs.


I'm glad I picked up these little birds at the after Christmas sales in Hobby Lobby.  They came in handy.  They are attached with wire so I can change their positions.

Wednesday, March 16, 2011

Coconut Lime Banana Bread

Here's my new favorite banana bread, made from this recipe.

 Look at the yummy crusty baked coconut on top and the tangy lime glaze.  
I'll make it again for sure.  It's a tasty way to use up your brown bananas.
The calories, in case you are wondering, are 2573 per loaf, or if you have 10 slices, 257 calories per slice (using ultragrain all purpose flour, fat-free sour cream, and fat-free milk)

Friday, March 11, 2011

Felt Bird Hair Clip


I got bored last night, and instead of cleaning the house like I should have, I decided to make something.  I grabbed some of the felt sheets I have and cut out a little bird for my daughter's hair.  I put a little polyfil in the middle to give it a little shape. I just hot glued a ribbon covered hair clip to the back.

Sunday, March 6, 2011

Spring Time Outfit

I had some fabric that was pieced together and half way made into a pillowcase.  It matched the quilt on my bed, but I just never finished it, so I decided to make it into something else.
This is just a very simple rectangle sewn into a tube.  I added a casing at the top and threaded in some elastic.  It was very easy.

Then I decided I needed a shirt to match and also a hair clip.


The bird was just appliqued with Steam a Seam 2 onto a white shirt from Target.  I found a bird silhouette I liked with a Google Image search, and I traced it by holding a piece of paper up to my computer screen.  I'm really glad the permanent marker didn't bleed through.

For the hair clip, I first made the petals like in this tutorial.  Then since I forgot to buy some fabric buttons when I was in a town with a Hobby Lobby this weekend, I made a little puff for the center instead.  Take a circle of fabric and sew all around the edge with a needle and thread.  Leave the ends long.   Then pull them together to cinch the circle and add a little bit of polyfil in the center.  Pull it all the way closed and tie the ends of the thread together.  Then sew your puff to the center of your flower petals and attach to a clip.
I think the hardest thing about this project is going to be convincing my daughter that it's ok to wear skirts on weekdays and not just for church on Sunday.  Last time I tried she insisted that skirts are only for church and maybe birthday parties.

Bring on the spring weather!

Friday, March 4, 2011

Freezer Paper Shirt Stencil

I followed this tutorial on the blog Just Another Day in Paradise to make a Chicks Dig Me T-Shirt.  I made it with a freezer paper stencil and Tulip Slick fabric paint.  I think the paint is supposed to be for a puff paint look, but it works well for this kind of design.  Since it's yellow on white, I also decided to paint in the words so they are easier to read.

I've made a couple of freezer paper stencil shirts before. 

Here's a flying pig that my daughter loved.  It was made with Tulip brand sparkle paint.

And here's a robot on a onesie for my son.
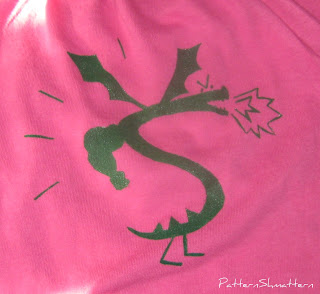
And a Trogdor shirt for my daughter.

Tuesday, March 1, 2011

Eco Friendly Mailing Envelope

I found this tutorial on Snickerdoodle for making your own recycled mailing envelopes, so for mailing my giveaway I made one.  I think it turned out cute (addresses are deleted in the photo).  The first try on fusing the plastic bags was a spectacular fail, but with a lower iron setting I got it to work on the 2nd try.