Saturday, April 30, 2011

Chenille Burp Cloth


My first child spit up like none other.  We had to carry around a hand towel at all times just to clean her up.  Most of the burp cloths that you buy at stores were not absorbent enough for her, so here's a tutorial you can make for that baby that spits up everywhere.  It's very absorbent, and the chenille side is very soft for their new baby skin.

You will need:
  • 1 fat quarter of 100% cotton woven material. I used homespun.
  • 1 fat quarter of complimentary fabric or pre-made 1/2 inch bias tape
  • An old towel.  You could also use a cloth diaper or cut terry cloth material.
  • Starch spray if you're making bias tape.
  • Coordinating thread

Prewash your towel and fabrics.  Then, fold one of your fat quarters in thirds to make a rectangle that's about 18 inches by 7 inches.

 Cut out your towel to the same size and pin the homespun fabric on one side like this.

Then, on the towel side, draw a diagonal line like this with a fabric marker or pencil.  This is the first line you will sew on.
With the homespun fabric down (you don't want the terry cloth catching in the feed dogs at all), sew diagonal lines about 1/4 of an inch apart across the entire burp cloth. (In this picture they're 1/2 an inch apart.)  How far apart you sew depends how many layers you have an what type of fabric you use.  If you have a looser weave like homespun, you either need to make the lines close together (about 1/4 inch) or you need to add more than three layers.  If you use flannel, for example, which is woven more tightly, you can do three layers sewn 1/2 an inch apart.

I turned around at the end of each line and made the next one without cutting the thread so it would go quickly.

Then with your very sharp scissors, carefully cut between your sewn lines.  Cut only the homespun fabric and be careful to not cut the terry cloth.

Trim up the edges.  Sometimes all of the diagonal sewing will skew the fabrics a bit, so I like to trim it to keep it all straight before adding the bias tape.

Next make the bias tape out of your other fat quarter.  Skip this step if you're using pre-made bias tape.  Cut strips 2 inches wide on the bias (diagonally).

Then sew these strips together until you have enough length to go around the whole burp cloth.  I needed 3 strips.  To sew them together, place them perpendicular and sew diagonally like this.

Press the seams open.  This is the starch I use.  Fold the whole length of fabric in half longwise and press it.  Then open it up.
Press each side to the center line.
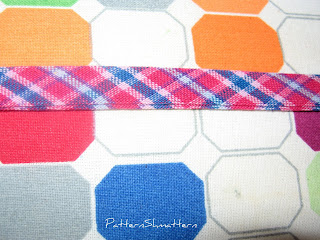
 Then fold it in half and press again.  Voila.  Homemade 1/2 inch bias tape.

Now sew that bias tape all the way around your burp cloth.  If you need a tutorial to show you how, here's a good one on the Smashed Peas and Carrots blog.

Before you wash it, it looks like this:

Throw your cloth into the washer and dryer to fluff and fray the chenille side.   It should get all soft and fluffy and nice for baby.
The Chenille Side
 The Towel Side
And an action shot...

Monday, April 25, 2011

Monster Gift Card Holder

 
I saw a really cute tutorial here for making a monster gift card holder, and I made a few modifications.  If you want to do the same modifications, here's how.
 
  • Cut out 2 rectangles: both 3.5 inches x 5.5 inches.(front and back)
  • Cut out 2 rectangles: both 3.5 inches x 4.25 inches (mouth)
  • Cut four rectangles: all 3.5 x 1.5  inches (2 arms, 2 legs)
  • Out of felt cut one rectangle: 3.5 x .75 inches and cut teeth out of one of the long sides
  • Out of the felt for the ears cut out 2 pieces that are the shape of the end of your thumb and about 1.75 inches long.
  • You also need a button and some embroidery floss
 In the original tutorial, the monster has no legs, ears, or fabric teeth (they're paper).  To add fabric teeth, sandwich the felt piece between the two right sides of the 3.5 x 4.25 inch fabrics.  Sew along the top.
Then turn it right side out and do some embroidery stitches to top stitch under the teeth.
You use this new mouth piece in place of the one layer piece in the original tutorial. 

To make the ears, fold the thumb-shaped pieces of felt in half longwise, and make a small stitch at the straight end to hold them in ear shape.  

Add them and the legs to the inside of the monster when you stitch the back on, just like you do for the arms in the other tutorial.  I only added one button for an eye, and I made the other eye with the embroidery floss.  I love how he turned out.  I think I shall name him Spartacus.

I think it could also be used for an ipod holder.  So fun!  I don't want to give him away, but he's for a graduation gift.

Tuesday, April 19, 2011

Easter Hair Clips

Happy Easter!


I made up a couple of hair clips for the holiday activities this week.  I cut up some felt and made them two layers thick for stability.  I added some ric-rac, ribbon, and decorative embroidery floss stitches on the egg.  They are hot glued onto ribbon covered clips.

Tuesday, April 5, 2011

Matching Easter Tie

It's not always as easy to find cute stuff to sew for boys, but I did find a great tie tutorial so my son's tie will match my daughter's Easter dress.  Yeah, yeah, I know the flowers might be a bit "girly," to quote my husband who is just glad I didn't also make him a matching tie, but I still think it'll be really cute.

I used the Little Boy's Tie tutorial on The Purl Bee.  I wasn't sure how long it needed to be, and after making it I realized it's about 6 inches too long for a toddler, so if you're making this for a toddler boy make sure to take 6 inches off the length of the skinnier end and it should be fine.
I made a few adjustments.  Instead of sew-in interfacing, I used the fusible kind since I had some around already.  I ironed it into place inside the tie before sewing the tie closed.  To make it safer for my 18-month-old boy, I made a cut where it will tie around the back of his neck, turned under the edges, and added Velcro, so he won't be strangled.  It's also a lot easier to tie it first and then put it on him with the Velcro than it is to get him to sit still while I tie it.

 
I'm so excited to have my kids be all matchy-matchy on Easter Sunday.

Sunday, April 3, 2011

Easter Dress

I found a great tutorial for my daughter's Easter dress on Ucreate.
U Create 
This was my first complicated piece of clothing, and this tutorial was a good one to start on.  It's fairly simple, no buttonholes, no fancy stuff, just a straight-forward dress.  I made the 5T size for my average sized almost 4-year-old daughter because I'd rather have it too big than too small.  It fits her just right and there's quite a bit of adjusting you can do with the button placement.


I changed just a few things- 
  • The skirt hem is shorter (about 1 1/2 inches instead of 4-5) because I didn't have quite enough of the yellow accent fabric
  • I used 3/4 inch buttons instead of larger fabric covered ones
  • I did flat-felled seams instead of serged or zigzag seams inside the skirt.  It should make the skirt more durable and there won't be any fraying.
  • I tacked the front of the sash to the dress just to keep it in place.
Also, check out the matching tie I made for my son.